Have you ever wanted to create your own double flip card? In this video I show you how I designed a double flip card in Cricut Design Space. Put your own twist on this card using Melody Lane’s digital paper. For this snowman card I used the Chloe Paper Set! It is an enchanting winter filled paper! One tip, when choosing a graphic for a flip card, try to use one that has a shadow layer. You can watch the video here!
Remember to use the code GEORGIA40X to receive 40% off Melody Lane Designs Chloe Paper and your entire purchase!
You can follow me on Youtube, Twitter, Instagram, Pinterest and Facebook!! Remember to share your projects and let us see how you are using Melody's Digital Paper!
Hi Everyone! Have you ever needed a sympathy card and didn't have much time to make it? This card is simple and quick to make. I chose Melody Lane's Skylar Digital Paper for this project because it gave me a sense of calm and peace. You could change the card up to suit whatever occasion you may need in a hurry! Watch the video here!
You can see and purchase the Skylar Digital Paper Set and remember to use the code GEORGIA40X to save 40% off your entire purchase!
You can follow me on Youtube, Twitter, Instagram, Pinterest and Facebook!! Remember to share your projects and let us see how you are using Melody's Digital Paper!
5) Place transparency sheet on top of foil and roll with brayer
6) Cut foil to size and wrap around photo mat or chipboard
7) Layer the transparency and foil pieces
Now that you have the background complete, it's up to you to create something for the front!
Finishing Notes
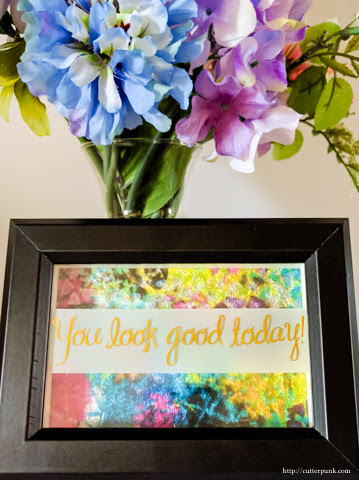
For my front, I chose to use some foiled text on an additional sheet of transparency, but found the text displayed best with a piece of vellum behind it.
In the video, you can see the difference between using a darker, monochromatic background like the Amy paper I show in the video versus a more rich and vividly colored image, like the Jenny digital paper set provides.
There is no need to glue the transparency to foil as the layers of the assembled frame will keep things in place. This makes it easy to swap designs if you want to freshen up a look!
The effect is best achieved when the foil is tightly pressed against the transparency, which the rear panel of the frame does quite well on its own. Try using additional pieces of cardstock or chipboard to shim things more tightly, if necessary.
I tried using some glossy Mod Podge to bond the transparency to the foil and it decreased the reflective bling of this technique, so I don't recommend it.
Share With Us
If you create a variation of this project, please share a link to a photo in the comments below. The MLD Design Team and other readers love to see your creations, too!
Not sure about this whole digital paper thing? Click here to download some of Melody Lane's digital paper for free and try it out for yourself!
You can find more of my designs on this blog, on MY BLOG, and my 'HOW TO' videos on my YOUTUBE channel... Don't forget to subscribe and stay up to date on all my new projects... Happy Crafting!!
Hi everyone! Welcome to my whimsical world of fairies! This would make a cute card for the little girl in your life or anyone who loves fairies. Melody Lane's Fairy Digital Paper + Oak Tree Stamps Fairy Wishes = A Perfect Match!
I designed this card in Cricut Design Space, then used pattern fill with the Fairy paper. Melody has a wonderful video on uploading and editing digital papers. Join me on Georgias Crafty Creations to see how to assemble this card. Use the code GEORGIA40X to get 40% off the Fairy Digital Paper and create you own Fairy project!
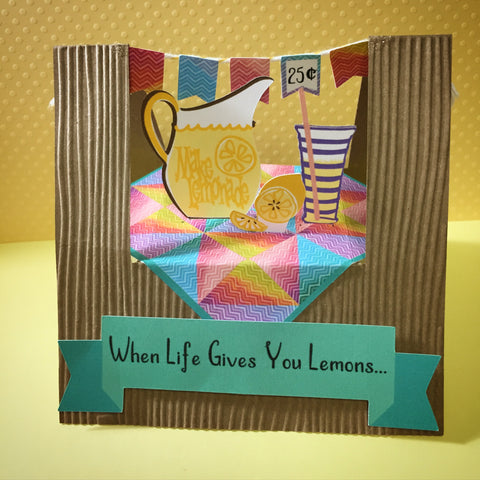
Who wouldn't love receiving this great gift card holder. Give it a vintage style with this AMY 8 Digital Paper or go to Melody Lane Designs - Catalogue to see the entire collection of Digital Paper.
Hello! Shannon again with another card. It was cold and rainy here today, so I spent the day in my craft room. I came across a really cool card on Pinterest that was cut with a paper trimmer and stamped, so I thought I would try to recreate it in Design Space and share the file with everyone!
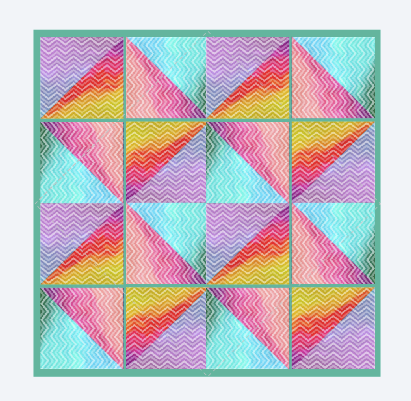
Notice the quilted table-cloth? That's 4 papers from the Lorrie collection! Don't they work just perfectly?! I used them as Pattern Fills for the triangles of the quilt, and then flattened everything together to make a very realistic and eye-catching table-cloth for the card!
You can find the link to the original project (which also includes a really great assembly tutorial), more information about how to use the Pattern Fill feature in this project, and the Design Space cut file on my Blog. I also highly recommend this really great video that Melody made to get better acquainted with pattern fills and digital paper. Enjoy!